このキットは発売からすでに30年以上が経過しており、一部パーツには経年劣化が見られます。
そのため、各パーツの状態を確認しながら、必要に応じて補強を行い、慎重に製作を進めていきます。
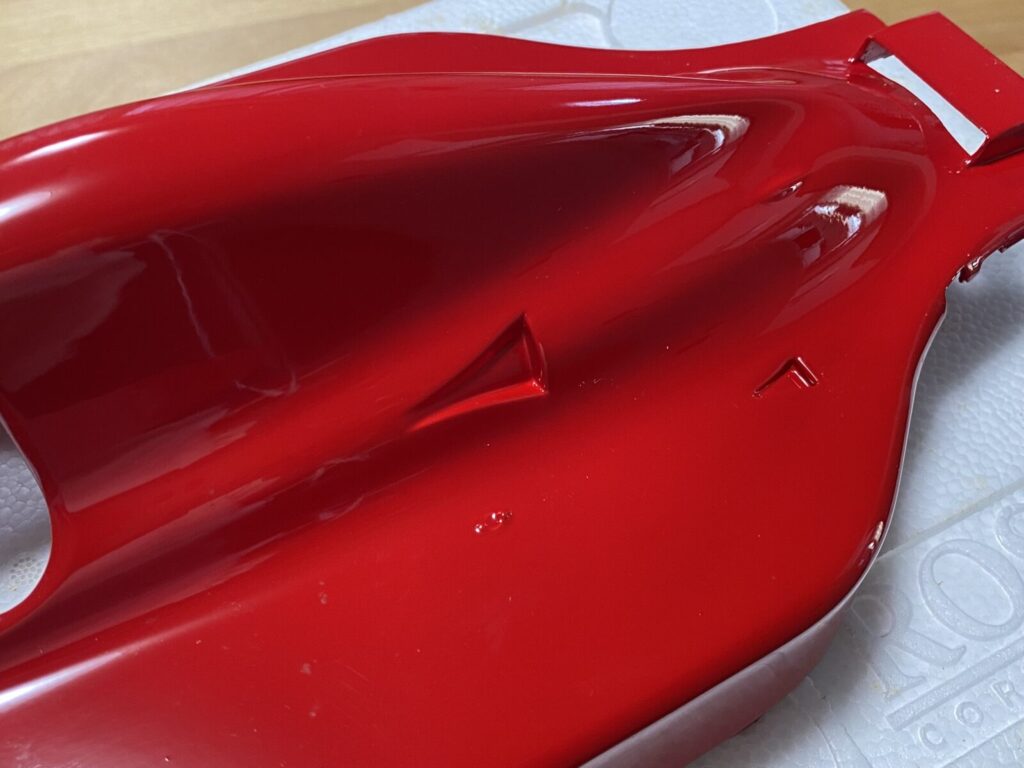
キットの特徴でもある塗装済みカウルについては、そのまま使用せず、一度すべて塗装を剥離したうえで再塗装を行います。これは塗装の劣化が見られるためだけでなく、キットのままではダクトが塞がれている箇所があり、実車に近づけるために開口加工が必要となるためです。
デカールについても、キット付属のものではなく、より質感の高い社外製リペイントデカールを使用する予定です。さらに、各部にディテールアップパーツや3Dプリンターによる自作パーツを取り入れ、可能な限り実車の雰囲気に近づけていきます。
細部にまでこだわりながら、完成度の高い一台を目指して製作を進めていきます。
As this kit was released over 30 years ago, some parts show signs of age-related deterioration.
For that reason, I will check the condition of each part and reinforce them where necessary, proceeding carefully with the build.
Regarding the pre-painted cowl, which is one of the kit’s key features, I will not use it as is. Instead, all paint will be stripped and the parts will be repainted. This is due not only to visible paint degradation, but also because some ducts are molded closed in the kit, requiring opening work to better match the real car.
The decals will also be replaced with higher-quality aftermarket repaint decals rather than using the kit-supplied ones. In addition, detail-up parts and custom 3D-printed components will be incorporated throughout to bring the model as close as possible to the real machine.
With careful attention to even the smallest details, I will aim to build a highly refined and accurate model.
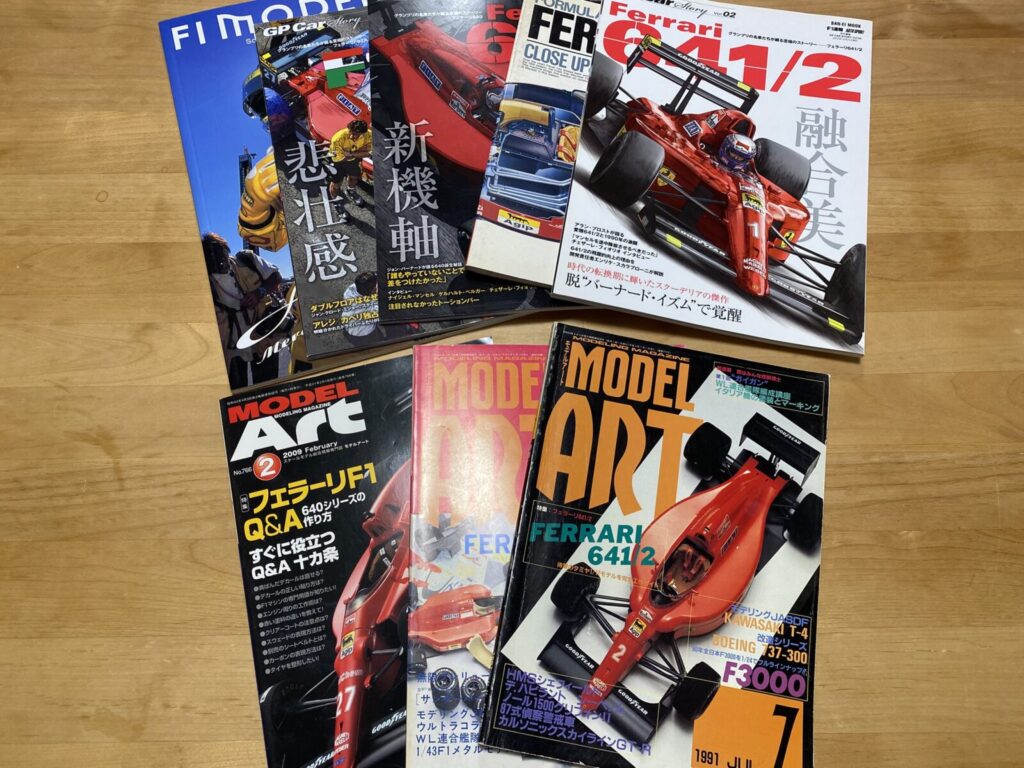
製作は、まず参考資料の収集から開始しました。
しかしながら、643単体を特集した書籍や写真集は見つけることができなかったため、今回は640シリーズ全体を扱った資料を中心に揃え、それらをベースに考証を進めていくことにしました。
細部については、インターネット上の画像や動画も併用して確認を行い、可能な限り実車の雰囲気を再現していく予定です。
I started the build by gathering reference materials.
However, I was unable to find any books or photo collections dedicated specifically to the 643. As a result, I decided to base my research on materials covering the 640 series as a whole, and proceed with the build using those as the primary reference.
For finer details, I will also rely on images and videos available online, cross-checking as needed to reproduce the look and feel of the real car as closely as possible.
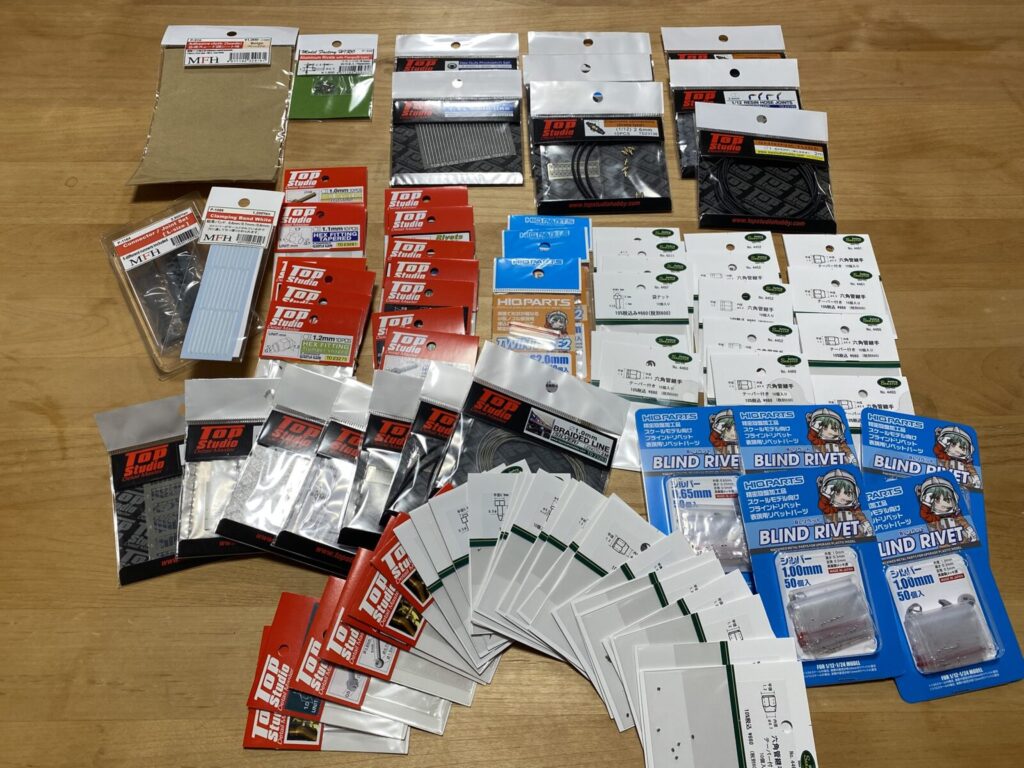
ディテールアップに関しては、モデルファクトリーヒロ、トップスタジオ、さかつうといった各メーカーのパーツを中心に、大量に用意しました。
また、写真には写っていませんが、配線やホース類についても1/8スケールに見合ったサイズのものを選定しています。
そのほかの細かなパーツについては、製作を進めながら必要に応じて買い足しつつ、既製品で対応できない部分は3Dプリンターを活用して自作していく予定です。
For the detail-up work, I have prepared a large number of parts mainly from manufacturers such as Model Factory Hiro, Top Studio, and Sakatsu.
In addition, although not shown in the photos, I have selected wiring and hoses with sizes appropriate for 1/8 scale.
For other small components, I will purchase additional items as needed במהלך the build, and for areas that cannot be covered with off-the-shelf parts, I plan to fabricate them using a 3D printer.
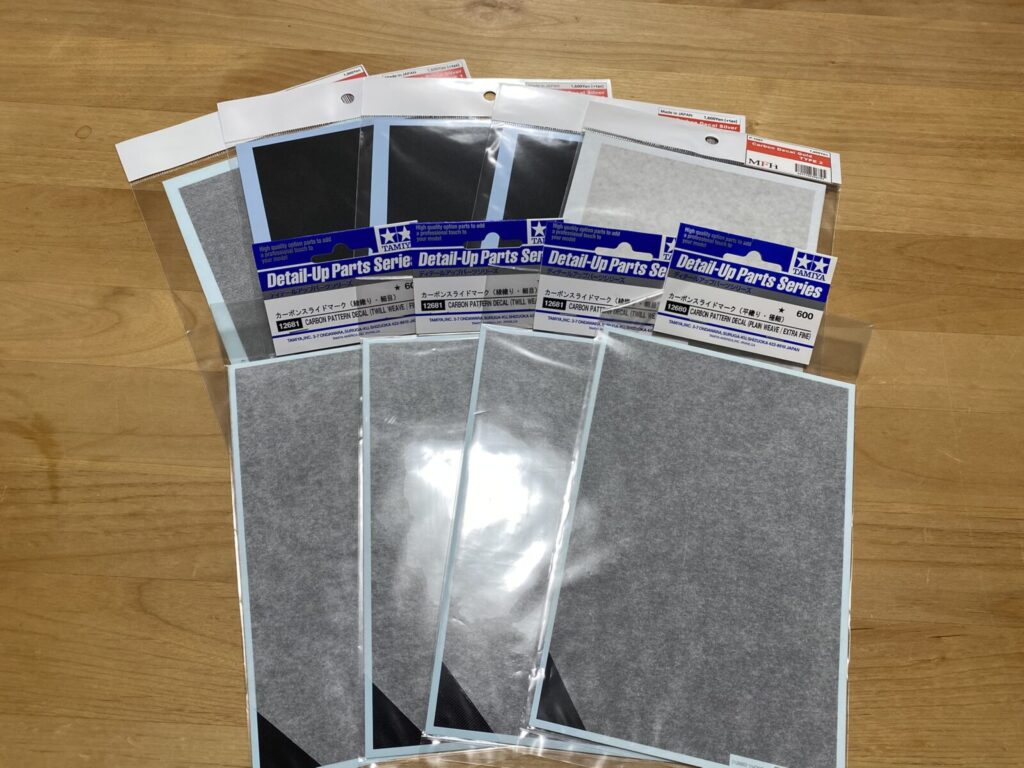
モノコックやウイングなどにはキットの段階でカーボン柄のモールドが施されていますが、それらはすべて削り落とし、カーボンデカールで仕上げる予定です。
そのため、ひとまず数種類のカーボンデカールを用意しましたが、1/8というビッグスケールのため、製作を進める中で追加購入が必要になると思います。
次回からいよいよ製作をスタートします。
Monocoque, wings, and other parts in the kit already have molded carbon pattern details, but I plan to remove all of them and finish the surfaces using carbon decals instead.
For that purpose, I have prepared several types of carbon decals for now, but since this is a large 1/8 scale build, I expect that I will need to purchase additional materials as the work progresses.
Next time, I will finally begin the actual build.